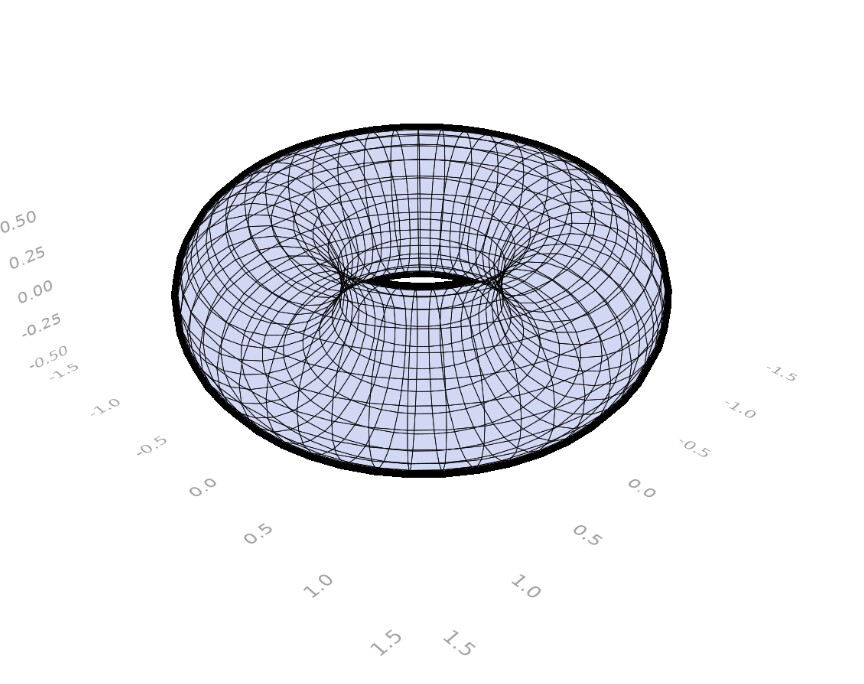
makie expert, need your help again. Is there away to obtain an “outline” effect like this?

Specifically, in drawing a torus as a surface

I’d like the outer edge and the inner “hole” to have an outline, similar to this:
using GLMakie, GeometryBasics

function torus(R, r, N, n)
    ps = Vector{Point3f}(undef, N*n)
    idx = 1
    for i in 1:N
        c = cos(2pi * i/N)
        s = sin(2pi * i/N)
        M = Mat3f(
            c, s, 0,
            -s, c, 0,
            0, 0, 1
        )
        center = Point3f(R*c, R*s, 0)
        for j in 1:n
            ps[idx] = center + M * Point3f(r*cos(2pi * j/n), 0, r*sin(2pi * j/n))
            idx += 1
        end
    end

    faces = Vector{GLTriangleFace}(undef, 2N*n)
    for i in 1:N*n
        faces[2i-1] = GLTriangleFace(
            i,
            mod1(i+n, N*n),
            mod1(i+1, N*n)
        )
        faces[2i] = GLTriangleFace(
            mod1(i+1, N*n),
            mod1(i+n, N*n),
            mod1(i+n+1, N*n)
        )
    end

    return normal_mesh(ps, faces)
end
To my understanding geometry nodes are a way to manipulate the rendering pipeline. Makie doesn’t let you do that, so you have to use or abuse what’s there… I have two ideas how to get something similar:
mesh(
    torus(1f0, 0.3f0, 100, 30), color = RGBf(1, 1, 1),
    specular = Vec3f(-1e-3), shininess = -4f0
)

You can also amplify color to values larger than 1 to get sharper outlines with this, but you can’t fully get rid of the dark blobs. But maybe those are nice in some situations? (negative shininess puts specular reflections near edges and negative specular results in brightness/color being taken away)
f, a, p = mesh(
    torus(1f0, 0.32f0, 100, 30), color = :black, depth_shift = 0.01f0
)
p2 = mesh!(a, torus(1f0, 0.3f0, 100, 30), color = :white)
f

depth_shift = 0.01f0 puts the black torus slightly behind the white one in the final depth buffer, so it only peaks out outside the white torus. Depending on the value of depth_shift you may get more or less peaking out. (Should always be between 0 and 1)
Hi,
This seems amazing, the only problem is that they way I currently have things set up I’m working with surface instead of mesh, is there a way to achieve something similar with surface that you know of?
Thank you
With a simple mesh you could try just scaling it for approach 2:
p = surface!(ax, ...)
scale!(p, 1.1)
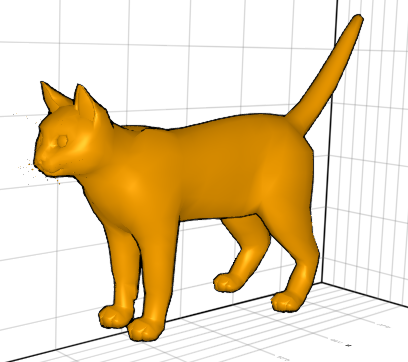
For a more complex mesh like a torus this wouldn’t work though. Something else you could try is translating all the vertex positions towards their normal direction. For example: (constants probably need adjustments)
using CairoMakie, GLMakie
GLMakie.activate!() # just in case

# example mesh
using FileIO
m = FileIO.load(Makie.assetpath("cat.obj"))

# CairoMakie has a (internal) surface -> mesh conversion function you can use
# m = CairoMakie.surface2mesh(xs, ys, zs)

# grow mesh
m2 = deepcopy(m)
scale = 0.0001 * m.position |> norm |> maximum
@. m2.position += scale * m.normals

f, a, p = mesh(m, color = :orange)
mesh!(a, m2, color = :black, depth_shift = 0.005f0)
display(f)
Hey,
That seems like it should work, but when I try it I can only see the black cat, the orange one is hidden no matter what I do. Any idea what could be happening?
This should be rendered with GLMakie (maybe WGLMakie also works). CairoMakie can’t deal well with 3D. It basically renders each plot! individually and then stacks the images on top of each other. So if you draw the wireframe last in CairoMakie, it’ll just put the full wireframe on top of everything else. It also doesn’t understand depth_shift. (You can switch back to GLMakie with GLMakie.activate!())
If you’re having issues with GLMakie maybe your version is too far behind (should be Makie 0.16+) or you’re using to much depth_shift? At the stage in rendering where depth shift applies, depth is normalized to a 0…1 range. So the values tend to be pretty small (and positive to move something deeper/away).